01
Getting started
Start and finish a workout
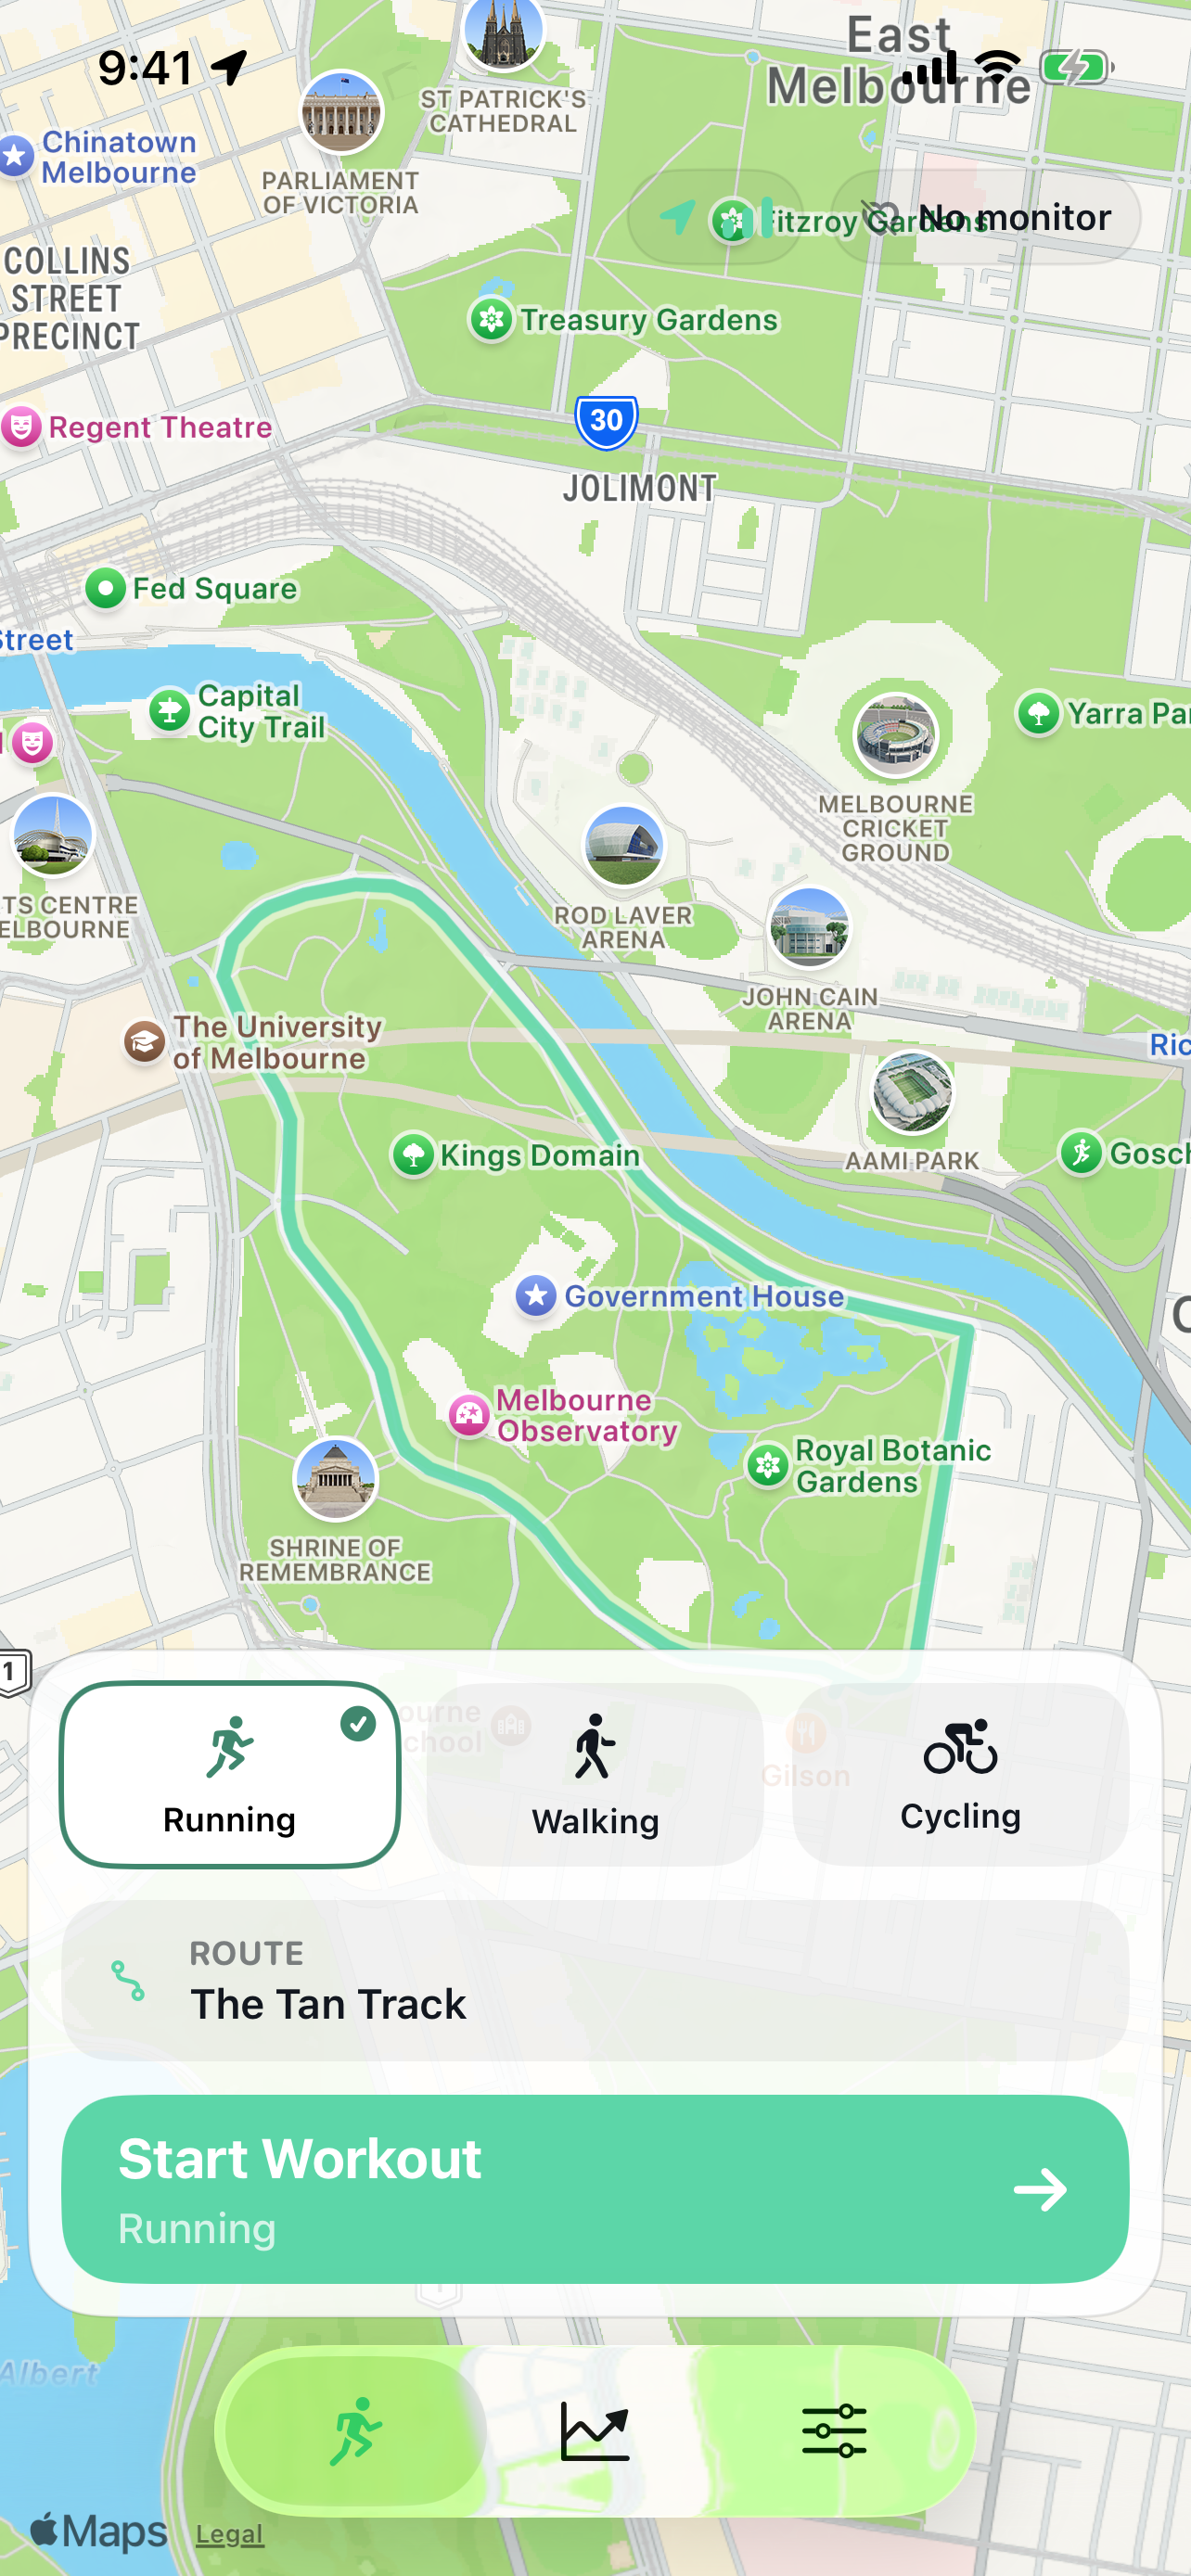
Choose what you are doing, decide whether you want a route, and start recording.
Record your first workout Activity, route, goal and start
What it does
Records your time, GPS route, distance, pace or speed, elevation and available sensor data.
- 1
On the start screen, choose Walking, Running, Cycling, or another available activity.
- 2
Tap Route if you want to follow a saved route. Leave it automatic if you simply want to record where you go.
- 3
If a heart-rate monitor is connected, tap Goal to choose the effort you want. Otherwise, no goal is required.
- 4
Tap Start Workout and wait for the countdown.
- 5
During the workout, swipe the bottom control to open Workout Options. Choose pause, resume, finish, or discard.
The live map, elapsed time and your chosen workout metrics. Heart rate and effort guidance appear only when relevant data is available.
02
Routes
Follow, repeat and compare routes
A route becomes more useful when Trail IQ can connect today’s workout with an earlier effort of the same activity type.
See what Trail IQ can show when you compare workouts on the same route.
Choose a route Automatic or a route you select
Before you start
Location access must be enabled so Trail IQ can find nearby routes and follow your position.
- 1
From the start screen, tap the Route control.
- 2
In Choose Route, select Automatic route to let Trail IQ use a nearby match, or choose a specific saved route.
- 3
Check the route line on the map and return to the start screen.
- 4
Start near the route and begin your workout.
The selected route appears on the map. During the workout, Trail IQ shows your progress and remaining distance when the route has a clear finish.
Save and reuse a completed route Turn a recorded path into a named route
- 1
Finish a workout that recorded a GPS route.
- 2
On the Workout Result, tap Save & Set Route.
- 3
Give the route a short name you will recognise.
- 4
Next time, open Choose Route and select it from your saved routes.
The route appears in the Routes library and can be assigned to future workouts.
Compare repeated workouts See where today changed
Before you start
You need an earlier workout of the same activity type on the same route.
- 1
Choose or automatically match the route, then complete the workout normally.
- 2
Open the saved Workout Result.
- 3
Open Route Comparison to see the direct result and the route sections where time changed.
- 4
Open Route Replay to view the route, overlays and finish context on the map.
Time and pace differences against a matching earlier effort, with heart-rate differences only when both workouts contain heart-rate data.
Use a Live Ghost See a previous effort while you move
Before you start
You need an assigned route and an earlier workout of the same activity type with usable route data.
- 1
Tap Route and select a route in Choose Route.
- 2
Turn on Live Ghost.
- 3
Under Ghost Opponent, choose Fastest on route, Latest on route, or Choose workout....
- 4
Start the workout. Follow your own marker and the ghost marker on the map.
The ghost’s map position and whether it is ahead or behind. The wording always describes the ghost’s position relative to you.
Finish automatically at the route end Let Trail IQ conclude a selected route
- 1
Open Settings, then Workout Setup.
- 2
Turn on Finish at Route End.
- 3
Select a route with a defined finish and start near its beginning.
- 4
Complete the route. Trail IQ checks that you have reached and moved through the finish area before ending.
A confirmation that the route ended and the workout was saved, followed by the Workout Result.
03
Heart rate
Connect a monitor and choose your effort
Heart-rate features appear when a compatible monitor is connected and sending data.
See how Trail IQ combines Bluetooth heart rate with route context.
Connect a Bluetooth heart-rate monitor Pair, connect and confirm live data
Before you start
Wear or activate the monitor and make sure Bluetooth is enabled on your iPhone. Some monitors must also be configured to share their live heart-rate feed with other apps.
- 1
Open the monitor manufacturer's app. If available, enable Broadcast Heart Rate, HR Sharing, Share with Other Apps, or Dual Bluetooth. The exact name varies by brand.
- 2
In Trail IQ, open Settings, then Devices & Health.
- 3
Tap Manage Devices, then scan for monitors.
- 4
Select your monitor when it appears and wait for Connected.
- 5
Return to the start screen and confirm that the monitor pill shows live heart rate instead of No monitor.
Live beats per minute, a heart-rate zone and heart-rate goal choices. Workout HRV appears later only when the monitor supplies compatible beat-to-beat intervals.
Choose a heart-rate goal Recovery, Easy Aerobic, Steady Aerobic or Hard Effort
- 1
Connect your heart-rate monitor before starting the workout.
- 2
Tap Goal on the start screen.
- 3
Choose Recovery, Easy Aerobic, Steady Aerobic, or Hard Effort.
- 4
During the workout, use the up arrow, down arrow or equals sign to adjust your effort.
An up arrow means increase effort, a down arrow means ease back, and the equals sign means you are in the intended range.
04
Coaching cues
Know what the cues are telling you
Choose distinct tones or tones followed by short spoken guidance. Both are designed to mix with music or podcasts.
Set up coaching cues Route, segment and heart-rate guidance
- 1
Open Settings, then Coaching & Heart Rate.
- 2
Set Coaching Output to tones, or to tones with spoken guidance.
- 3
Turn on Route Guidance for prompts based on the selected route.
- 4
Turn on Segment Cues for climbs, recovery sections and upcoming sections when enough route history exists.
- 5
Choose a Cue Frequency of Low, Standard, or Frequent, then use Preview Coaching Audio to hear the selected output.
05
Results
Understand what happened
The first screen gives you the result. Open a highlight only when you want the detail behind it.
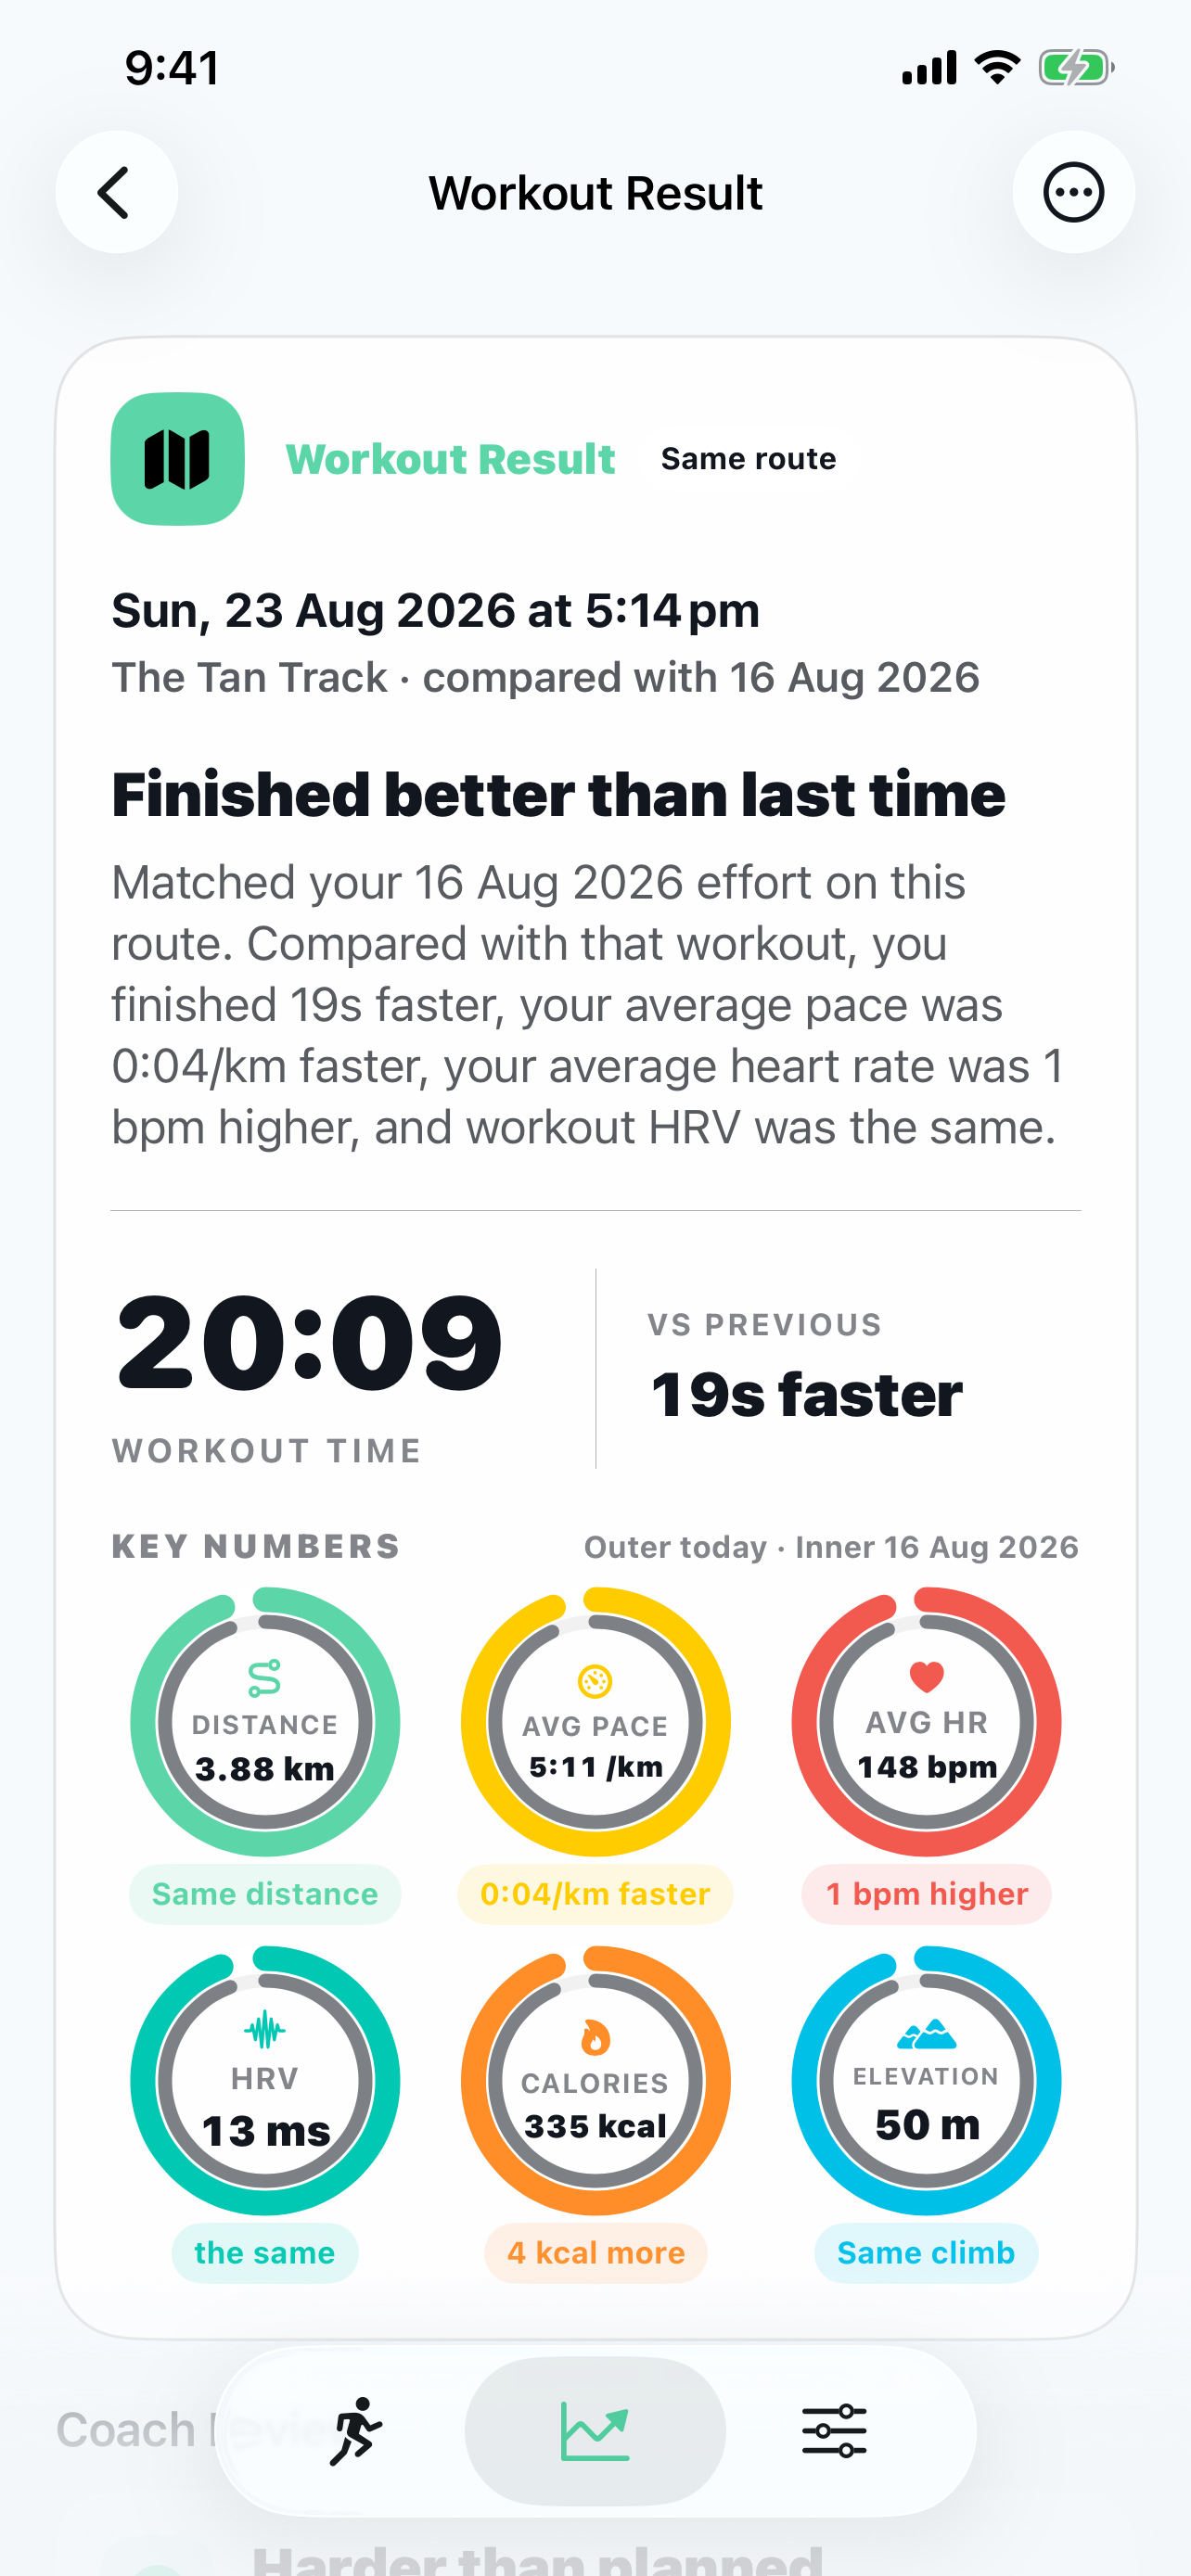
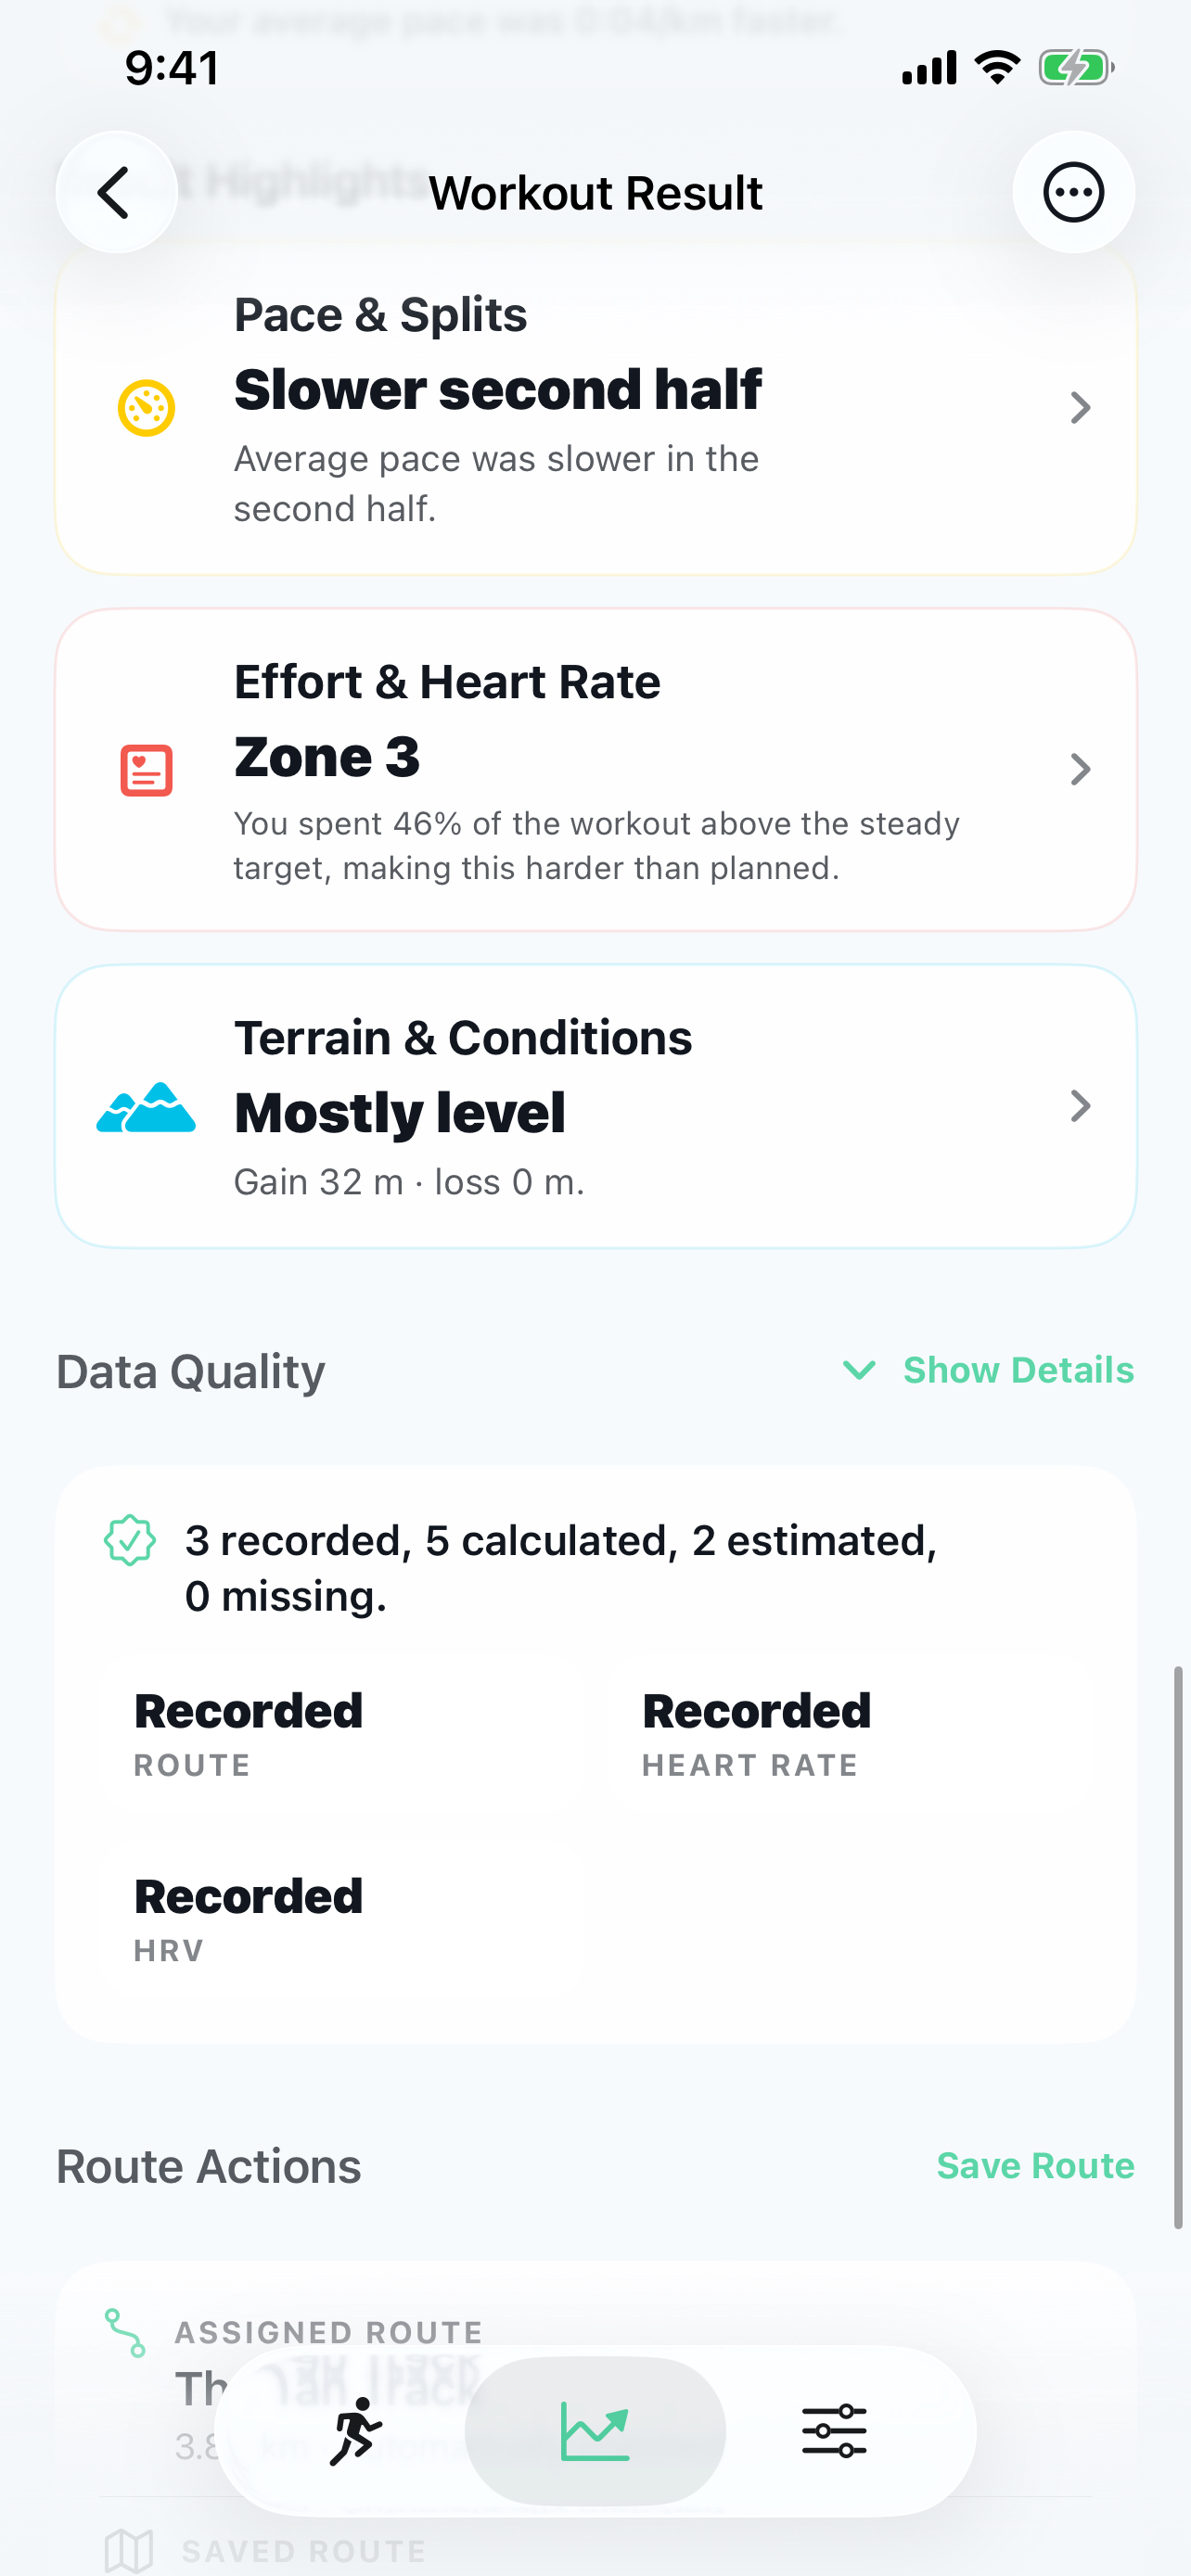
Read a Workout Result Answer first, details second
- 1
Read the top block for route identity, the main result, workout time and key numbers.
- 2
Read Coach Review for what went well and one practical next step.
- 3
Use Route Story to see the workout on the map.
- 4
Open a tile under Result Highlights for its focused report.
- 5
Open Data Quality only when you want to check which measurements were recorded or estimated.
Only relevant sections appear. Heart rate, Workout HRV, conditions and comparisons stay hidden when the required data is unavailable.
Use Route Comparison and Route Replay Move from the answer to the route story
- 1
Open Route Comparison to see the overall time difference and largest section changes.
- 2
Tap Route Replay to open the completed route at a useful map scale.
- 3
Choose the route, comparison, pace, heart-rate or elevation overlay when that data exists.
- 4
Use Route History when the route has multiple matching attempts.
06
Your data
Use Apple Health and local backups
Trail IQ keeps these actions separate so granting access never silently imports an entire workout history.
Learn how Trail IQ keeps personal training local-first and free from a social feed.
Enable Apple Health Permission, import and export are separate choices
- 1
Open Settings, then Devices & Health.
- 2
Turn on Enable Apple Health Features.
- 3
Tap Request Apple Health Permission and choose what iOS may read or write.
- 4
To bring existing workouts into Trail IQ, separately tap Import Recent Workouts From Apple Health.
- 5
Review the import preview before confirming anything.
Trail IQ shows what is available for import and merges recognised duplicates rather than deliberately creating another copy.
Import workout files GPX, TCX, FIT and supported Adidas exports
- 1
Open Settings, then Privacy & Data.
- 2
Under Imports, choose Import GPX, TCX or FIT Workouts, or choose Import Adidas Running Export for a supported Adidas archive.
- 3
Select the file in the iOS file picker and review the import summary.
- 4
Confirm the import. Trail IQ normalises supported data and checks for an existing workout before adding another copy.
- 5
Open Results or Routes to review imported workouts and any familiar routes they reveal.
A summary of workouts added, skipped as duplicates, or enriched with useful details that were missing from an existing record.
Back up, restore or delete data Keep control of local Trail IQ data
- 1
Open Settings, then Privacy & Data.
- 2
Scroll to Backups & Reset.
- 3
Tap Export All Data before changing phones, deleting data, or testing a restore.
- 4
Use Import All Data From Backup to restore a Trail IQ backup file.
- 5
Use the specific delete controls when you want to remove workouts, routes or tests, or choose the full reset only when you intend to start over.
Unlock or restore Full Access One purchase, no recurring subscription
When you need it
Five completed workouts are included. Full Access unlocks unlimited workout recording.
- 1
Open Settings, then Trail IQ Access.
- 2
Check the one-time price supplied by the App Store in your storefront currency.
- 3
Tap Unlock Full Access and confirm the purchase with Apple.
- 4
If you purchased previously, tap Restore Purchase using the same Apple Account.
Trail IQ confirms Full Access and removes the workout recording limit. The purchase does not renew monthly or annually.
07
Frequently asked questions
Quick answers about Trail IQ
The essentials about routes, privacy, imports, heart rate and Full Access.
Does Trail IQ require an account?No account or public profile
No. Trail IQ does not require a Trail IQ account, public profile or social login.
Does Trail IQ upload workout and route data to Trail IQ servers?Local-first storage
No. Trail IQ does not upload your workout or route history to Trail IQ servers. Optional Apple Health and WeatherKit features use Apple services under their own permissions and terms.
Can Trail IQ compare workouts on the same route?Matching history required
Yes. Trail IQ recognises familiar routes and compares matching workouts of the same activity type when suitable history is available. Live Ghost is optional and does not control the comparison saved after a workout.
What is Route Memory?Your repeated-route patterns
Route Memory learns evidence-backed patterns from repeated workouts on the same route, including typical performance and recurring strong or difficult sections.
Can Trail IQ import old workouts?GPX, TCX, FIT and more
Yes. Trail IQ supports GPX, TCX and FIT workout files, supported Adidas Running export archives and optional user-initiated Apple Health import. Import checks help prevent duplicate workouts.
Does Trail IQ work without a heart-rate monitor?Heart rate is optional
Yes. GPS routes, time, distance, pace or speed, elevation, splits and route comparison work without a monitor. A compatible Bluetooth Low Energy monitor adds live heart rate, zones and related insights.
Does Trail IQ require a subscription?One-time Full Access purchase
No. Five completed workouts are included, then Full Access is available as a one-time, non-consumable in-app purchase.
Is Trail IQ a social fitness network?Personal, not public
No. Trail IQ has no social feed, public profile or public leaderboard model. It is designed to help you understand your own training history.
Something not working?
Move from learning to support.
Use the common checks or contact Trail IQ support. The app never sends your workout or health data automatically.